Now seems about the best time to teach you how to properly clean and sanitize your smartphone, as the spread of the COVID-19 coronavirus heightens our awareness of personal hygiene.

According to a 2016 study, we touch our phones on average 2,600 times per day. The same study also claims that we pick up our devices 150 times during a 24-hour period. 

Because smartphone use has only increased since then, it’s very likely that those figures are now even higher. So because of that, it, in means that our smartphones and tablets are highly prone to serious pathogens such as E.Coli and MRSA without factoring in the recent coronavirus epidemic — that is, if we don’t clean them correctly.

Things to avoid

Alcohol wipes and gels — anything over 70% alcohol will damage your display oleophobic coating.

cleanphone1

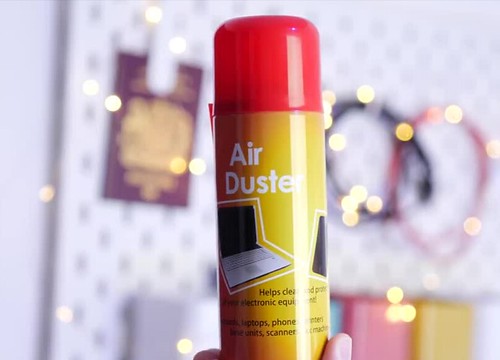
Compressed air — most compressed or canned air can be flammable and may cause device issues. It can also leave a damaging solvent coating that can discolor or damage your device.
 
cleanphone2

Water (on devices without IP ratings) — a small amount of water on an antimicrobial cloth will do no damage, but too much water can cause severe issues with your smartphone.
 
cleanphone3

Never dunk your phone, laptop, trackpad or keyboard in a cleaning agent or spray a cleaner or aerosol spray directly onto the product. That just raises the risk you’ll get moisture in openings like the charging port.  

Things you might want

Antimicrobial cleaning cloth

Screen protector + cleaning wipes

UV sanitizer

Wash your hands

cleanphone6

The easiest method of cleaning your Android phone and screen is to use an antimicrobial cleaning cloth. You can slightly dampen your cleaning cloth with lukewarm water or with 70 percent isopropyl alcohol and then gently wipe the display, bezels, and rear of your Android phone.
 
clean1

If you have a screen protector installed, you can wipe your display with disinfecting cleaning wipes. Alternatively, you can replace your screen protector regularly. The screen protector will ensure that your display is safe from any solutions that might damage the oleophobic coating or the phone itself.
Twitter

Tweets can now be scheduled in advance when composing a tweet on the web based version on Twitter.

Schedule a tweet for later. Follow the below steps to schedule posts on Twitter.

Step 1:  Log in to your Twitter account and open tweet composer window and type your Tweet.

Step 2: Click on Schedule Button
When you are ready to schedule your Tweet, Click on the Schedule button. 


Step 3: Set Tweet Schedule Date and Time
From the ‘Schedule’ window Set Date, Day, Year, and Time.


Step 4: When you’re ready to continue, click “Confirm.”


Step 5: Click “Schedule” to finish scheduling the tweet.

How to Find Scheduled Tweets or Draft Tweets on Twitter

Method 1: From the compose tweet window, Click on "Unsent Tweets."


Method 2: Directly by visiting this URL https://twitter.com/compose/tweet/unsent

From the Unsent Tweets window; Select Schedule Tab or Draft. 

How to save a tweet as a draft

If you don't want to finish a tweet in the moment and would like to come back to it, simply save it. Just follow these steps:

Step 1: Compose a tweet.

Step 2: From the compose window, hit the left arrow icon in the top left corner.


Step 3: Select Save.


Facebook

Facebook is finally enabling desktop users to set the social network into Dark Mode to save your eyes when browsing late at night - and give your battery life a boost too. Here's how to set it up on your PC.

Go to Facebook’s website in any desktop browser and log in to your account. If you haven’t already enabled the new Facebook Desktop interface, doing so is as easy as flipping a switch in your account’s settings.

Step 1: Click on the down arrow in the top-right corner to open your Account menu.

Step 2: You can then toggle the “Dark Mode” option to activate the setting.
 
fbdarkmodepc1

If you want to revert to Light Mode, you can turn off Dark Mode by following these same instructions.
Facebook

Facebook's desktop website is getting a visual overhaul that almost everyone can access. Find out how to use this brand new, less cluttered design in their small tutorial. 

Head on over to Facebook’s desktop website on your computer and log in to your account. 

Step 1: Click on the down arrow in the top-right corner of the interface. 

Step 2: Select the “Switch To New Facebook” option. The page will refresh and the new interface design will load.
 
fbnewmode01

How to Switch Back to Facebook’s Old Interface

Once you’ve enabled the new interface, you can always revert the change from your Facebook account’s front page. To do this, click on the down arrow in the top-right and then select “Switch To Classic Facebook.”

 
fbnewmode02

Office 2019 comes with several new features that customize the visuals of your projects.

Office 2019 is only available for computers running Windows 10 or one of the three most recent versions of macOS

Use the Morph transition in PowerPoint

Upgrading from PowerPoint 2016 to PowerPoint 2019? There are several new features that make it easier to create professional-looking presentations.

You can apply the Morph transition to slides to create the appearance of movement in a wide range of things—text, shapes, pictures, SmartArt graphics, and WordArt. Charts, however, don't morph.

 It's present in In the navigation pane, Transitions -> Morph

PowerPoint191

Zoom for PowerPoint

To make a presentation more dynamic and to allow for custom navigation within it, try Zoom for PowerPoint. When you create a Zoom in PowerPoint, you can jump to and from specific slides, sections, and portions of your presentation in an order you decide while you're presenting, and the movement from one slide to another uses a zooming effect.

There are three kinds of zoom you can set up. Summary Zoom summarizes the entire presentation on a single summary slide. Slide Zoom includes only the slides selected before issuing the command. Section Zoom shows a single section only.

Insert → Zoom → Summary Zoom / Section Zoom / Slide Zoom

PowerPoint192

Insert icons in Microsoft Office

Easily insert icons and Scalable Vector Graphics (SVG) files into your Microsoft Office documents, workbooks, email messages, and presentations. Once they're in place, rotate, color, and resize them with no loss of image quality. These icons are free to use; there's no royalty or copyright.
 
PowerPoint193

A Text Highlighter

PowerPoint 2019 features the Text Highlight Color tool that Microsoft Word has had for several versions now. Find it on the Home tab, in the Font group. To highlight text, select the Highlighter tool and then drag across the text. To turn off the Highlighter, press Esc or click the arrow next to the Text Highlight Color button and choose No Color. 

PowerPoint194

Insert 3D models to see all angles

Use 3D models to increase visual and creative impact in presentations. Easily insert a 3D model, and then rotate it through 360 degrees.

Bring a model to life in your presentation with the Morph transition, which creates cinematographic animations between slides.

PowerPoint195

Export to 4K

When you export a presentation to video, 4K resolution is now an option.
 
PowerPoint196

For tablet computers

Customizable, portable pen set

Choose a personal set of pens, highlighters, and pencils for inking, and have them available to you across the Office apps.
 
PowerPoint197

A straightedge for drawing straight lines

On devices that have touch screens, you can use the Ruler on the Draw tab of the ribbon to draw straight lines or to align a set of objects. Position the ruler horizontally, vertically, or anything in between: it has a degrees setting so that you can set it at a precise angle, if necessary.
 
PowerPoint198
Twitter

Twitter is rolling out the ability for users to limit who can reply to their tweets.

Step 1: Open Twitter on your phone or desktop.

Step 2: Tap on the globe icon and select who can reply to your tweet.

The options are fairly straightforward.
 
  • Everyone -- this is the current default option. For public accounts, it means that everyone will continue to be able to reply. If your Tweets are protected, it means only people who follow you will continue to be able to reply.
  • People you follow -- only people who you follow, as well as anyone you mention in the Tweet, will be able to reply.
  • Only people you mention -- only people who you mention in the Tweet will be able to reply. That last one can effectively be a “no one can reply” option if you don’t mention anyone in the tweet itself.

Step 3: Once you select the option you want, compose your tweet and tap tweet.

tweetrestriction1

A few things to note:

When your Tweet is live, people will see that you’ve limited who can reply to your Tweet.

Restrictions you place on your Tweets will only apply to the ability for others to reply to your Tweet. Others can still engage with your Tweet by, for example, liking or Retweeting it, or voting on a poll you include in your Tweet.

Once you’ve published a Tweet, you cannot later change the restrictions other than by deleting the Tweet. Replies and Retweets of your Tweet will inherit the restrictions you placed on the root Tweet, but Retweets with Comments will not inherit your restrictions.
If the root Tweet is deleted, replies and Retweets will lose any previous restrictions.

If you deactivate your account, any reply restrictions your Tweets currently have will lift, and if you reactivate your account during the reactivation window, all previous reply restrictions will be reapplied. However, during the window when your reply restrictions were lifted, it’s possible that replies that would have otherwise been restricted could have been added to your conversation.
peoplecard

Google has launched a new feature called People Cards and it’s available only in India as of now. This allows you to create a virtual business card that appears in Google search results. In this tutorial, I will tell you how you can create your own personalised virtual business card on Google search.

Step 1: To create a People Card, sign in to your Google Account.

Step 2: Search for your name, or “add me to Search” and tap the prompt that appears.

peoplecard1

Step 3: You will be asked to provide your phone number for verification purposes.
 
peoplecard2

Step 4: Enter the six-digit verification code to continue.
 
peoplecard3

Step 5: To start building your people card, people can choose to include the image from their respective Google account, add a description of themselves, links to their website or social profiles, and, if they want, even a phone number or email address.
 
peoplecard4

Step 6: Once all the information is filled, click on preview and then Save. You can then choose to view your Search Card.
 
peoplecard5
According to World Health Organization: Disinfection practices are important to reduce the potential for COVID-19 virus contamination in non-healthcare settings, such as in the home, office, schools, gyms, publicly accessible buildings, faith-based community centres, markets, transportation and business settings or restaurants.

High-touch surfaces in these non-health care settings should be identified for priority disinfection such as door and window handles, kitchen and food preparation areas, counter tops, bathroom surfaces, toilets and taps, touchscreen personal devices, personal computer keyboards, and work surfaces.

During this lockdown while you’re madly cleaning and disinfecting your home, give a thought to cleaning that lifeline, the one you check a hundred times a day.

Every time you touch your phone, the phone picks up bacteria from your hands. A 2012 study by the University of Arizona found that cellphones carry 10 times more bacteria than a toilet seat – because people clean toilet seats but they seldom clean their phones. Same goes for their laptops or desktops.

Ponder that one. While you’re pondering, grab a cloth.

Make sure you unplug the phone and turn it off first.
 
clean1

Never dunk your phone, laptop, trackpad or keyboard in a cleaning agent or spray a cleaner or aerosol spray directly onto the product. That just raises the risk you’ll get moisture in openings like the charging port.  
Use a disinfecting wipe with 70 percent isopropyl alcohol, on the hard, nonporous surfaces like the display, the keyboards and other exterior surfaces as long as you don’t use bleach and avoid getting moisture in an opening.
 
clean2

You can also use soft, damp, lint-free cloth with 70 percent isopropyl alcohol.

If you want to go full-high-tech, you can try a UV phone sanitizer that uses UV-C light to break down germs. Those can get costly but it is a stronger way to disinfect your phone.
 
clean3

And don’t forget game consoles, gamepads and remote controls, especially since those may be the items that you’re using the most while staying at home. Give those puppies a once-over with a disinfecting wipe.

Last but not least don't forget to wash your hands for minimum 20 seconds after cleaning your gadgets.

Snoozing an alarm on your mobile is easy. But, did you know that you can snooze an email in Outlook.com and get the same email at a predefined time? This article shows the exact steps to make use of the “Snooze” functionality so that you can reply to an important email at a specific time without forgetting.

Sometimes we need to get back to an email and read it carefully before replying. When you are in a hurry, it cannot be done – no matter how important the email is for you. The problem starts when you forget about that email due to a busy schedule. Therefore, you can use the Snooze option in Outlook for the web so that it can show you the exact email at a particular time.

To snooze an email in Outlook.com, follow these steps-

Step 1: Open Outlook.com in the browser.
Step 2: Select an email that you want to snooze.
Step 3: Click the Snooze button.


Step 4: Select a preset time or set custom date/time.


You can select a time as given in the list. However, if you need to set a custom time, you can select the Choose a date option and select the date and time as per your requirement.

Now, it should be moved from Inbox to another folder that you can find on the left-hand side.

What happens when you snooze an email
When you snooze an email in Outlook.com, it gets moved from the Inbox folder to the Snoozed folder. It helps users check all the snoozed emails whenever possible.

Snooze only works in the Inbox, so if you have an email elsewhere that you want to snooze, either move it to the Inbox in Outlook Online.

If you want to deal with it before then, open the “Snoozed” folder, select the snoozed email, and then click the “Unsnooze” button.
Winten

Way 1: If you have a desktop icon for Control Panel, just double-click it.
 
controlwinten01

Way 2: Click in the Cortana search box, which is next to the Windows icon at the far left of the taskbar, then start typing control panel. Click it open.

controlwinten02

Way 3: Click on the Windows icon to bring up the Start menu, then find the “Windows System” folder and click to expand it, so that you will see the Control Panel.
 
controlwinten03

Way 4: Step 1: Open Run dialog using the Win + R keyboard shortcut.
 
wintensetting05-01

Step 2: Type in control and click OK.
 
controlwinten04-02

Way 5: Launch Command Prompt, then type in control and press Enter key.
 
controlwinten05

Way 6: Open Windows PowerShell, then type in control and press Enter key.

controlwinten06

Way 7: Open the Settings app. Type control panel in the “Find a setting” search box, and then choose Control Panel from the drop-down list.
 
controlwinten07

Way 8: Type control panel into the Address toolbar on the taskbar, and press Enter key.
 
controlwinten08

Way 9: Open File Explorer, then type control panel into the address bar and press Enter key.
 
controlwinten09

Way 10: Go to C:\Windows\System32, then find the control.exe application file, and double click it.
 
controlwinten10

Way 11: Step1: Open the Task Manager, and click File > Run new task.
 
controlwinten11-01

Step 2: Once the “Create new task” dialog opens, type in control and click OK.
 
controlwinten11-02