msword

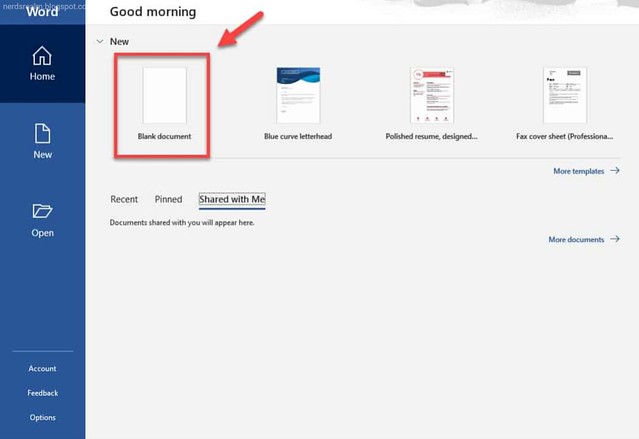
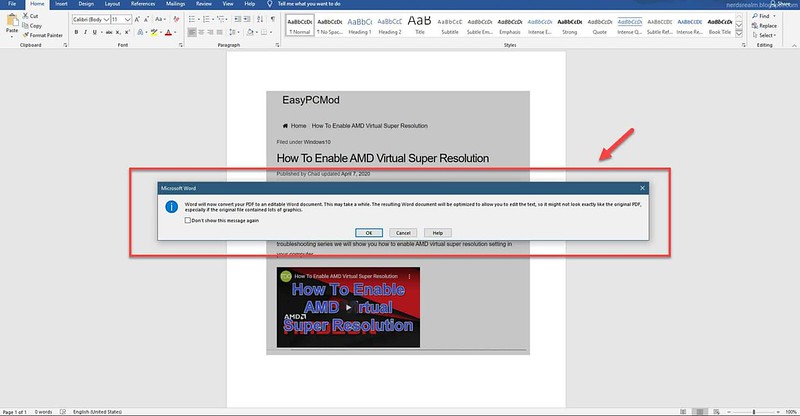
Getting the text document from a photo can be a long process if you do it manually. The good news is that this can be done automatically. 

Step 1: Open Microsoft Word.
You can do this by clicking its icon in the Start menu list of applications.

Step 2: Create a Blank document.
You can do this by clicking on “Blank document” located on the upper left side of the Word application.

pictoword1

Step 3: Drag the JPEG image to the Word document.
This will insert the photo to the document. Save the document as a PDF file.
 
pictoword2

Step 4: Save the document as a PDF file.
You can do this by clicking on File – Save As. Choose the download location then make sure that the “Save as type” is set to PDF(*.pdf).

pictoword3

Step 5: Open the PDF file using Word.
You can do this by clicking File – Open then browse for and click the PDF file.

pictoword4

Step 6: Click OK on the new window that appears. 
Word will convert the PDF file to an editable Word document. The editable document will open in a new Word window.

pictoword5

After performing the steps listed above you will successfully convert image to Word document.
WhatsAppdarkmode1

Dark mode allows you to change the color theme of WhatsApp from white to black and can be enabled or disabled in your device settings or Control Center. This feature is available on iOS 13 and above. 

Step 1: Go to iPhone Settings.

WhatsAppdarkios1

Step 2: Tap Display & Brightness.
 
WhatsAppdarkios2

Step 3: Select from the following options under APPEARANCE:

  • Dark: Turn dark mode on.
  • Light: Turn dark mode off.
  • Automatic: Enable dark mode to turn on automatically at a specific time. Select Sunset to Sunrise or set a Custom Schedule.
 
WhatsAppdarkios3

Enable dark mode from Control Center

Step 1: Go to iPhone Settings > Control Center > Customize Controls.

Step 2: Add Dark Mode under INCLUDE to have it appear in Control Center.

Step 3: Open Control Center:

On iPhone X and newer, swipe down from the top right of the screen.

On iPhone 8 and older, swipe up from the bottom of the screen.

Step 4: Tap the dark mode icon to turn dark. mode on or off.
pictureback01

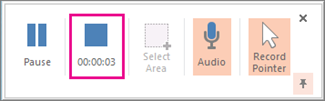
You can record your computer screen and related audio, and then embed it in your PowerPoint slide—or you can save it as a separate file.

To record and listen to audio associated with your screen recording, you'll need a sound card, microphone, and speakers.

Make sure there's enough disk space on your local drive to record and save your screen recording.

Step 1: Open the slide that you want to put the screen recording on.

Step 2: On the Insert tab of the ribbon, select Screen Recording.

record1

Step 3: On the Control Dock, click Select Area (Windows logo key+Shift+A), or, if you want to select the entire screen for recording, press Windows logo key+Shift+F. 

record2

Tip: PowerPoint automatically records the audio and the mouse pointer, so by default those options are selected on the control dock. To turn them off, deselect Audio (Windows logo key+Shift+U) and Record Pointer (Windows logo key+Shift+O).

Step 4: Click Record (Windows logo key+Shift+R). 

Tip: Unless you pin the Control Dock to the screen, it will slide up into the margin while you record. To make the unpinned Control Dock reappear, point the mouse cursor at the top of the screen.

Step 5: To control your recording:  

  • Click Pause to temporarily pause the recording (Windows logo key+Shift+R). 
  • Click Record to resume recording (Windows logo key+Shift+R).
  • Click Stop to end your recording (Windows logo key+Shift+Q).

record3

Step 6: When you are finished recording, save your presentation: File > Save. The recording is now embedded on the slide you selected in step 2.

To save the recording itself as a separate file on your computer, right-click the picture on the slide that represents the recording, and select Save Media as. In the Save Media As dialog box, specify a file name and folder location, then click Save.

 
record4
WhatsAppdarkmode1

Dark mode allows you to change the color theme of WhatsApp from white and green to more subtle shades of black and gray. This produces less glare at night, and makes WhatsApp more comfortable to use in low light conditions.

Darker screens also use less power. Finally, it just looks cool, and makes a refreshing change from all-white interfaces. It's always good to have more options.

First of all, you need to update your WhatsApp to the latest version available on the Google Play Store.

Step 1: Open WhatsApp and tap on the three dots located at the top right corner. 

Step 2: Tap on the Settings option.

Step 3: Open the ‘Chats’ option.

Step 4: Tap on the ‘Theme’ option.

Step 5: Enable Dark mode.

WhatsAppdarkmode2
pictureback01

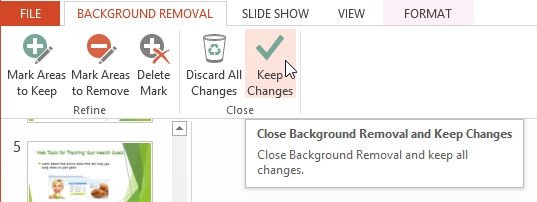
Removing a Solid Color Picture Background in PowerPoint

The fastest way to remove an image background is to use the Set Transparent color tool. The only catch is this only works for removing solid colors, like white backgrounds.

pictureback02

Step 1: Insert and select a picture on your slide

Step 2: Navigate to the Picture Tools Format Tab.

Step 3: Open the Color drop down.
 
Step 4: Select the Set Transparent Color tool (your cursor becomes a little pen with an arrow)

Step 5: Click on the color you want to remove from your background.

pictureback03

When set transparent color doesn’t work

Example #1: This technique does not work well if your background and image are too similar in color.

pictureback04

Example #2: This technique does not well with gradient color backgrounds. 

Example #3: This technique does not work well with minute details like strands of hair or clothing. This also includes pixels around people’s hands, as pictured below.
 
pictureback05

Removing a complicated image background

 
pictureback06

Step 1: Select the desired image, then click the Format tab.

Step 2: Click the Remove Background command.

pictureback07

Step 3: PowerPoint will try to guess which part of the image is the background, and it will mark this area with a magenta fill. It will also place a box around the image with selection handles.

 
pictureback08

Step 4: Drag the selection handles until all of the foreground is inside the box. After you do this, PowerPoint may readjust the background.

Step 5: At this point, you may need to help PowerPoint decide which parts of the image are foreground and which parts are background. You can do this by using the Mark Areas to Keep and Mark Areas to Remove commands:

If PowerPoint has marked part of the foreground magenta, click Mark Areas to Keep and draw a line in that region of the image.
 
pictureback09

If part of the background has not been marked with magenta, click Mark Areas to Remove and draw a line in that region of the image. 
 
Step 6: After you add your marks, PowerPoint will readjust the image.
 
pictureback10

Step 7: When you're satisfied with the image, click Keep Changes.
 
pictureback11

Step 8: The background will be removed. You can adjust the image at any time by clicking the Remove Background command again.

 
pictureback12
outlook

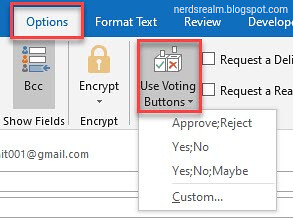
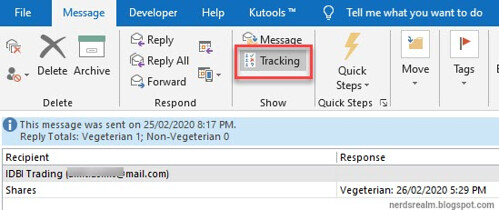
It's easy to create a poll in Microsoft Outlook by including voting buttons in an email message.

Step 1: Create an email message or reply to or forward a message that you received.
 
outlookvote1

Step 2: On the Options tab, in the Tracking group, click Use Voting Buttons.
 
outlookvote2

Step 3: Choose one of the following: 

Approve Reject - Use when you need an authorization for an action. For example, you can send an email request to several recipients seeking their approval of a project proposal.

 Yes; No - Use when you need either a yes or no. This is a good way to take a quick poll.

Yes; No; Maybe - Use when you don't want to limit the choices to yes and no. This voting option offers an alternative response.

Custom - Use to create your own custom voting button names. For example, you can ask your colleagues to choose a lunch between vegiterian or non vegiterian.

outlookvote3

If you chose a Custom voting button, do the following:

In the Properties dialog box, under Voting and Tracking options, select the Use voting buttons check box.
 
outlookvote4

Use the default button options, or delete the default options and then type the text that you want, and use semicolons to separate the button names.

Click Close You will get a notification on the top saying that you added voting buttons to this message.

outlookvote5

How to respond to vote in outlook?

The receiver of the mail gets an additional message advising them to respond by using the vote button. That Vote button appears to vote for your choice.
 
outlookvote6

After you selected your vote a box pops up verifying the poll response, you can also edit if required or click OK.
 
outlookvote7

At the same time the sender also received a mail reveling your vote.

How To View Voting Results In Outlook?

An alternate way to track survey responses is to open the original email from the Sent Items folder and click “Tracking” under the Show section.
 
outlookvote8
reduce0

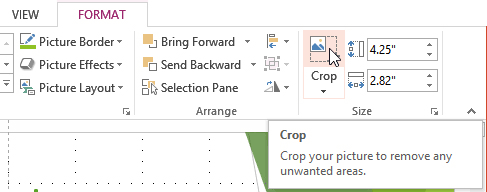
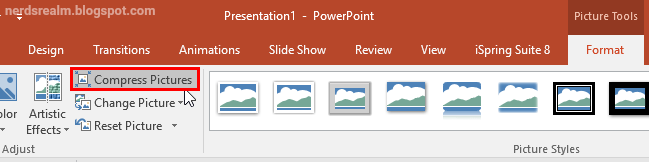
How can I reduce the size of my PowerPoint presentation and make it easier to upload or share? 
 
Crop your pictures

When you crop an image, a part of the picture is removed. Cropping may be helpful when a picture has a lot of content and you want to focus on only part of it.

Step 1: Select the image you want to crop. The Format tab appears.

Step 2: On the Format tab, click the Crop command.
 
reduce01

Step 3: Cropping handles will appear around the image. Click, hold, and drag a handle to crop the image.
 
reduce02

Step 4 Click the Crop command again. The image will be cropped.

Compress all pictures 

Step 1: Select the picture you want to compress, then click the Format tab.

Step 2: Click the Compress Pictures command.

reduce03

Step 3: Apply only to this picture: This check-box, when selected enables you to compress just the selected picture. If you want to compress all the pictures in the presentation, make sure you deselect this check-box. 

Step 4: Place a check mark next to Delete cropped areas of pictures.

Step 5: Choose a Target output. If you are emailing your presentation, you may want to select Email, which produces the smallest file size. When you are done, click OK.

reduce04

High fidelity: This is the default option for picture compression in PowerPoint 2016, and you may see it always greyed out. This option preserves the quality of the original picture unless it exceeds the size of the document canvas. 

HD (330 ppi): Choosing this radio button will enable compression for Screen resolution to display the presentation on high-definition displays. Some projectors have a higher resolution than a monitor. 

Print (220 ppi): Select this radio button if you are printing the presentation on paper; it keeps the photos at a resolution where they will look crisp on a printout.

Web (150 ppi): Choosing this radio button will enable compression for Screen resolution to display the presentation using a projector or distributing via Internet.

E-mail (96 ppi): Select this radio button if you are e-mailing the presentation to others, because this lower setting results in a smaller file that will transmit more easily via e-mail 

Link to video file Instead of Embedding Them

Consider the difference in file size if you embed an entire YouTube video in your presentation instead of linking back to it. Embedding an entire video will significantly increase the size of your presentation. There are certainly some valuable benefits when embedding a file vs. linking to it (such as when the recipient might not have internet access to play the video), but if the file size is an issue, just don’t do it.
Gmail

Step 1: Launch your favorite browser and log into your Gmail account as you normally would.

Step 2: Next, click the cog icon in the upper-right corner of the screen and click See all settings from the drop-down menu.
 
vacares1

Step 3: From there, choose Themes Tab You’ll now see a selection of images you can choose as your new background. If nothing immediately jumps out at you, click the More Images option at the bottom.

 
Gmailtheme1

It’s worth noting that when going through the themes, selecting one gives you a preview of how it would look. This is particularly useful if you’ve customized your inbox with labels and color-coding.

step 4: Choose a theme and Click Save. You should now be able to see your new background.

Gmailtheme2

If you’re feeling lucky, scroll all the way down the Pick Your Theme window and choose the Random image option.

Gmailtheme3

To choose from your own photo collections 

At the bottom of the Pick Your Theme window, you should see a My Photos option. Click that.

 
Gmailtheme4