
The fastest way to remove an image background is to use the Set Transparent color tool. The only catch is this only works for removing solid colors, like white backgrounds.

Step 1: Insert and select a picture on your slide

When set transparent color doesn’t work

Example #2: This technique does not well with gradient color backgrounds.

Removing a complicated image background

Step 1: Select the desired image, then click the Format tab.

Step 3: PowerPoint will try to guess which part of the image is the background, and it will mark this area with a magenta fill. It will also place a box around the image with selection handles.

Step 4: Drag the selection handles until all of the foreground is inside the box. After you do this, PowerPoint may readjust the background.

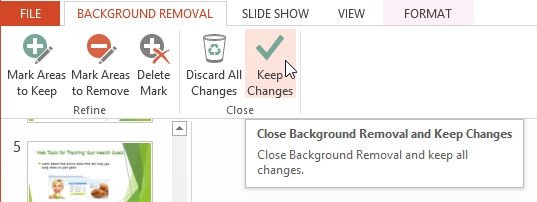
If part of the background has not been marked with magenta, click Mark Areas to Remove and draw a line in that region of the image.

Step 7: When you're satisfied with the image, click Keep Changes.
Step 8: The background will be removed. You can adjust the image at any time by clicking the Remove Background command again.

Step 2: Navigate to the Picture Tools Format Tab.
Step 3: Open the Color drop down.
Step 4: Select the Set Transparent Color tool (your cursor becomes a little pen with an arrow)
Step 5: Click on the color you want to remove from your background.
Example #1: This technique does not work well if your background and image are too similar in color.
Example #3: This technique does not work well with minute details like strands of hair or clothing. This also includes pixels around people’s hands, as pictured below.
Step 2: Click the Remove Background command.
Step 5: At this point, you may need to help PowerPoint decide which parts of the image are foreground and which parts are background. You can do this by using the Mark Areas to Keep and Mark Areas to Remove commands:
If PowerPoint has marked part of the foreground magenta, click Mark Areas to Keep and draw a line in that region of the image.
Step 6: After you add your marks, PowerPoint will readjust the image.