This article includes a step-by-step guide on how to use IRC, as well as plenty of resource material to help you learn mIRC more.
Step 1: Install mIRC


Download and Install mIRC from the official mIRC webpage

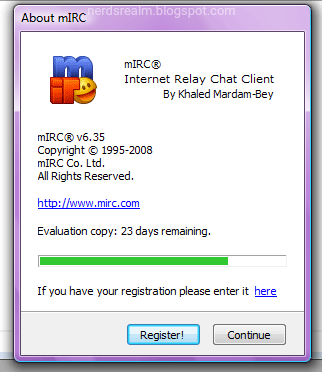
When you open the program, a pop up window gives you the option to register your copy for a small fee. This is completely optional. For now, just hit the Continue button. If another window pops up, hit Continue once again.

Step 4 — Create a Nickname
Now you will be taken to the Connect category in Options. Create a nickname. Two users on the same network cannot have the same nickname, which is why it’s a good idea to choose something really unique for your nickname and to input an alternative.

Step 5 — Join a Channel
If everything went according to plan, you will connect to the server, and a Favorites window will pop-up with a list of commonly used channel names. You can choose one, or if you know the channel you want, you can enter it.

Finding a Channel


Step 2 — Run mIRC

Step 3 — Choose a Server
Now we are going to choose a server. mIRC has a list of popular servers to make things easy. Go to File > Select Server, or hit Alt+E to open up the mIRC Options window. Choose the server you want, and click the Select button.

Please note: The Name and Email fields are optional. Most people do not use their real information in these fields.
Once you have filled out the nickname, and the alternative, click the Connect button.


Once you are connected to a server, you may have trouble finding channels you are interested in.
Let’s now explore three different ways to browse channels on an IRC network.
C
Channels List
Press Alt+L while in the mIRC Channels List window, or go to Tools > Channels List. You can get the full list of active channels by clicking the Get List button.
The LIST Command
/list
Another way to find a list of channels is with the LIST command. Once you enter the command, a window with a list of all the available channels will pop-up.
List of useful commands while on mIRC
/join #channel
This allows the user to join any channel that does not require a password.
/join #channel password
This is the same basic command as the one above, but adds a password string for channels that are password protected.
/who #channel
Gives some info on users in the channel.
/leave #channel
You leave the channel.
/part #channel
This will make you leave the specified channel. You can also just hit the "X" on the channel window.
/quit
This will disconnect you from whichever server you enter it in
/whois nickname
You get some info about nickname or whatever nickname you entered.
/whois yournick
This is some info others see about you.
/nick newnick
Changes your nick to "newnick"
/msg Nickname hi there.
Only Nickname sees your message (you don't need to be on the same channel for this to work).
/msg nickserv register password email
Starts the registration process, which is required to enter some channels. You must use a valid email address.
/msg nickserv identify password
When performed on a nick you own and with the proper password, this command will confirm your identity.
IRC Glossery
Your nickname is the IRC equivalent of your screen name. You can change it freely (see the Commands section) during the list of useful commands above.
Channel: A channel is the IRC equivalent of a chatroom. You can join multiple channels at the same time. All channel names have a # in front of them to indicate what they are.
IRC Client: An IRC client is a program that connects to the IRC network.
IRC Server: An IRC server is a remote computer hosting the channels and users on an IRC network.
IRC Network: An IRC network is a group of IRC servers connected together to allow people using them to communicate.
Channel Operator (“op”): An op is someone who controls a channel on IRC. This allows them to kick people out of the channel, set its topic (the description seen in the titlebar of the channel window), and perform other administrative tasks. Ops have an @ displayed next to their name in mIRC.
Voiced User (“voice”): A voiced user is someone recognized as being “important” in a channel. In mIRC, voiced users are denoted by the + next to their name. At the hosts' discretion, the channel can be “moderated,” and then only voiced and opped can send text to the channel.
Please note:
Always follow the channel and server rules, otherwise you may be booted or banned from the chat room. If you do not know the channel rules, ask to speak to a moderator.
Even with a fake name and email, it is possible for someone to track your chat back to your computer. Illegal activity and hostile interactions are not recommended.


0 comments:
Post a Comment