This tutorial is created by me. I have really worked hard on this post as I do in every other post so I have one request. Please show your appreciation by not stealing this post and do not copying it as is without giving me the credit for it. I would really appreciate it. Thank You!
Download:
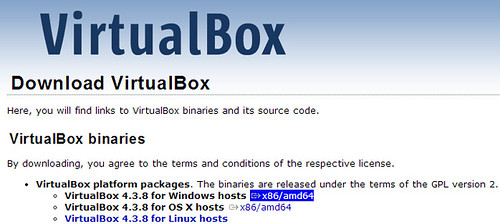
- Oracle VM VirtualBox Download the latest version of VirtualBox from https://www.virtualbox.org/wiki/Downloads
- Android x86 4.3 Image Download the Android 4.3 image from http://android-x86.googlecode.com/files/android-x86-4.3-20130725.iso
- Alternative link to Android image http://www.4shared.com/file/-13fwx4Tce/android-x86-43-20130725.html
- Another alternative link to Android image https://mega.co.nz/#!bQUUAZZS!KjeYWaVxLF8kL4duc0aU7boyzPecz1EKSgWNys35ycg
- Install VirtualBox latest version from the link given above and open VirtualBox

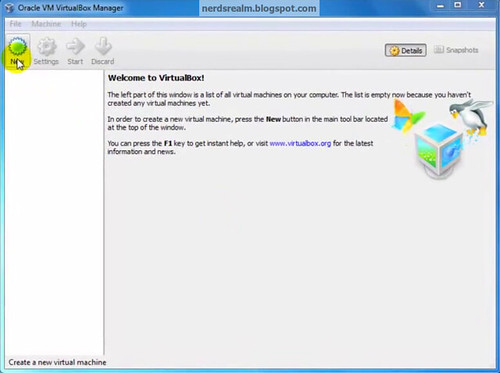
Step 1: Open VirtualBox and select New.
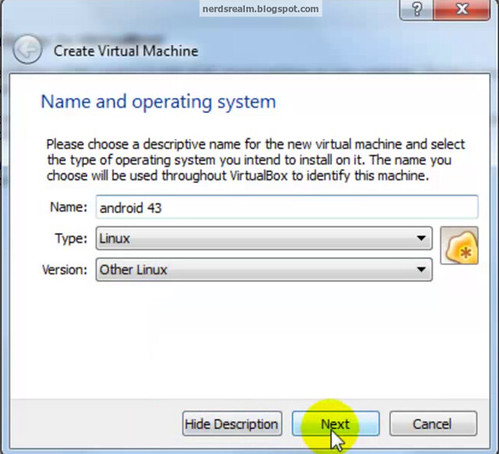
Step 2: In the dialogue box enter the name as you wish and Select type as Linux and version as other and click Next.
Step 3: Enter the amount of ram you would like to allot for the virtual machine and click Next . Android 4.3 requires at least 1 GB of ram but its not necessary.
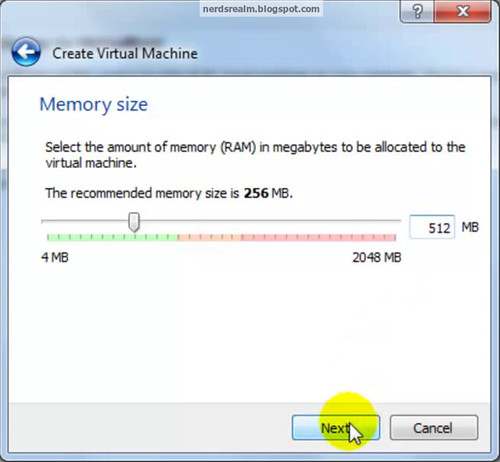
Step 4: In the next window select Create a virtual hard disk and click Create.

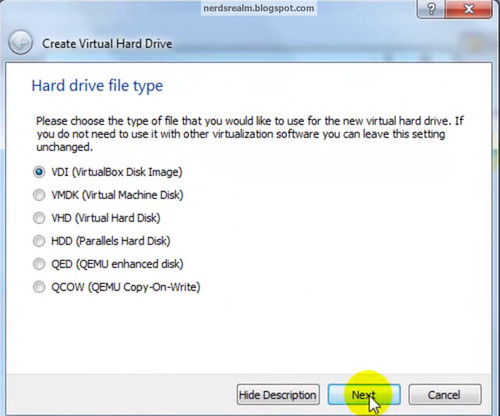
Step 5: Then select VDI and click Next
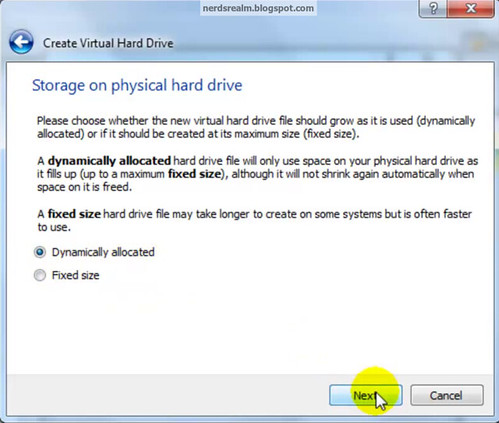
Step 6: In the next window, According to your space requirement you can either select dynamically allocated or fixed size for your storage space . I selected fixed size because I wanted to allocate only 4 GB of storage space to android .
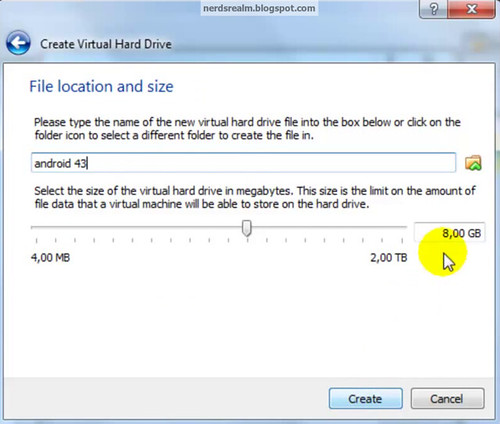
Step 7: Select storage space (Minimum 1 GB required for Jelly Bean)
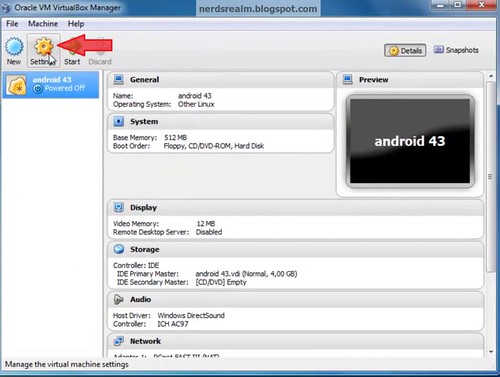
Step 8: Click on the settings button in VirtualBox .
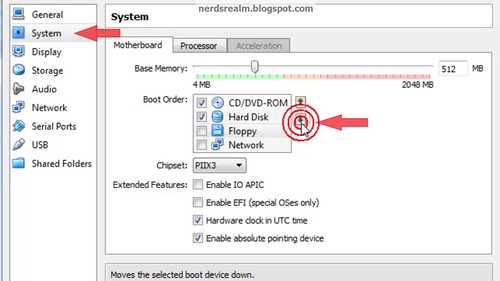
Step 9: Select System and under Motherboard tab select Floppy and untick mark the Floppy option. Using the down arrow key move the Floppy below Hard Disk.
Step 10: Select Storage, below the storage tree select empty.
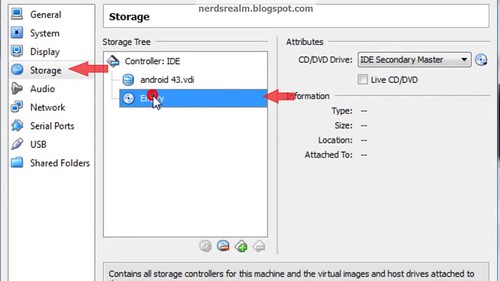
Step 11: Click on the disk image and select choose a virtual CD/DVD disk file.

Step 12: Select the android 4.3 .ISO image and click Open. Check the Live CD/DVD box and click Ok .

Step 13: Click Start to start the Setup.
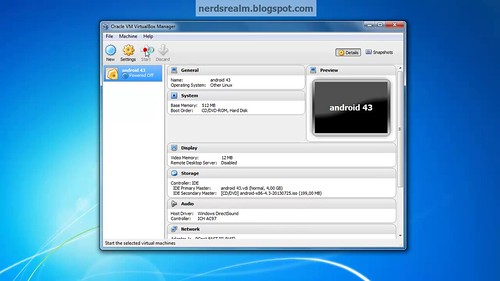
Step 14: In the screen select Install Android-x86 to hard disk.
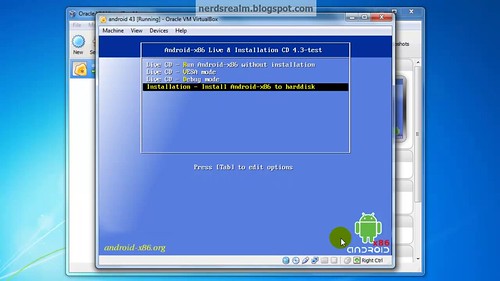
Step 14: Select Create/Modify Partition.

Step 15: Select New using your keyboard arrow keys.
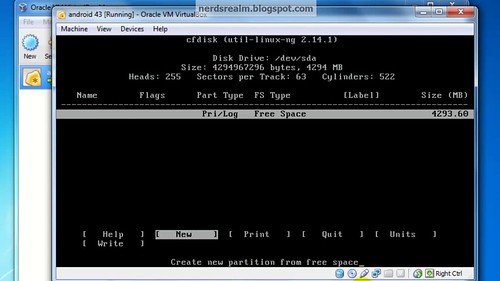
Step 16: Select Primary press Enter.

Step 17: Select Bootable and press Enter to make the drive bootable.
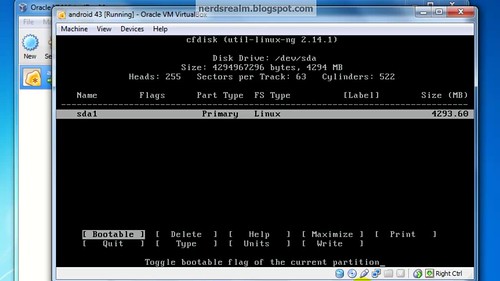
Step 18: Select Write and press Enter
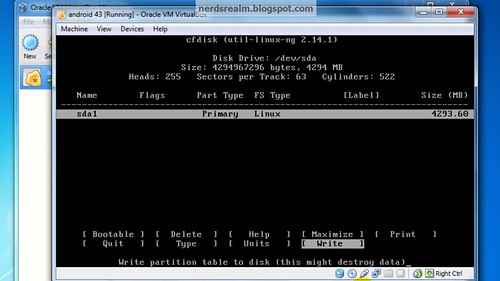
Step 19: Using your keyboard type the word Yes and press Enter.
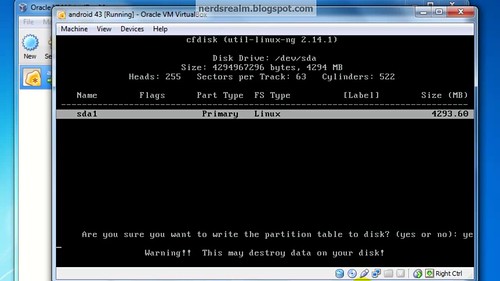
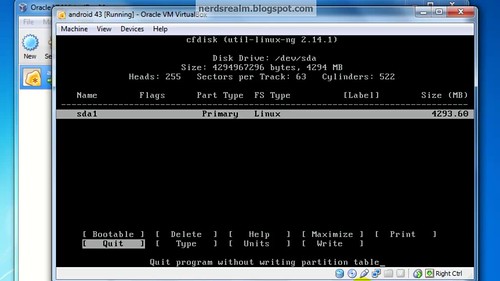
Step 20: Select Quit and press Enter.
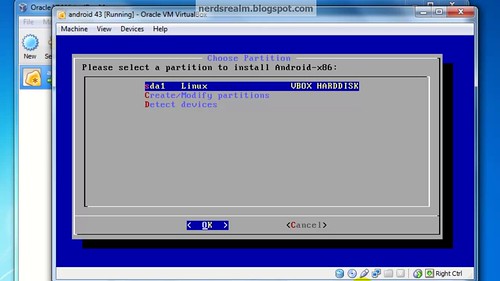
Step 21: Choose sda1 Linux and press OK.
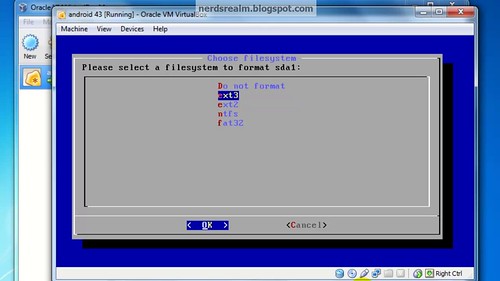
Step 22: Select ext3 and press OK.
Step 23: Select Yes.
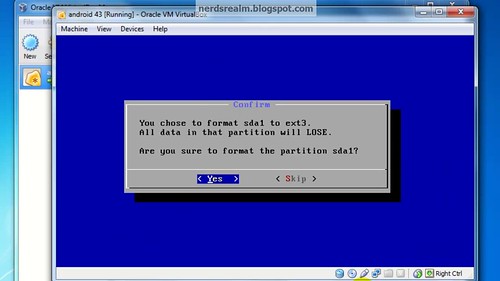
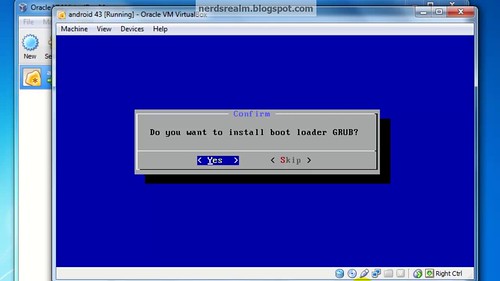
Step 24: When prompted to install grub loader select Yes.
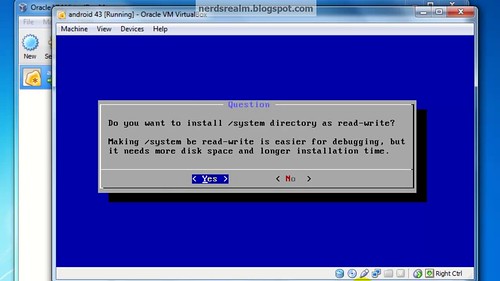
Step 25: Select Yes.
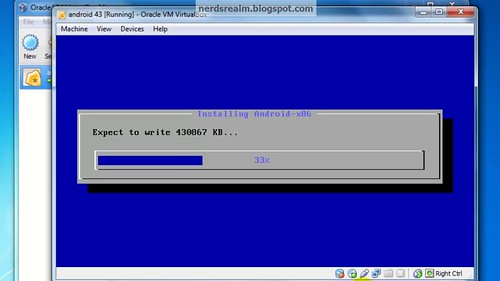
Wait for it...

Step 26: Select Machine option on VirtualBox and click on Disable Mouse Integration while Android loads.

Select your language and follow the screen to set-up your Gmail account to your Android among other things.

Voilà! Now you have successfully installed Android 4.3 on your windows computer
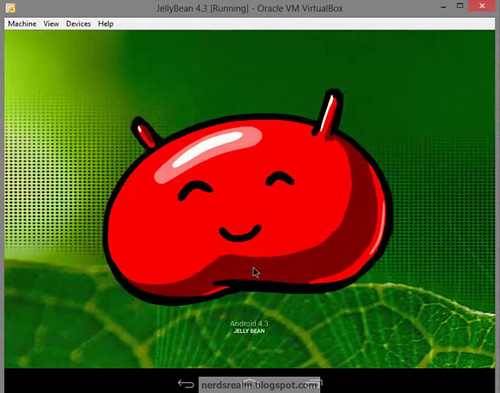
Here is a video to help explain the same procedure.


Here is a video to help explain the same procedure.



thnks but i can't downlod android-x86 can you give another link
ReplyDelete+karun dawadi This is the website:
ReplyDeletehttps://code.google.com/p/android-x86/downloads/detail?name=android-x86-4.3-20130725.iso&
Click on the File link. It may prompt you to enter security characters from a picture. Enter the characters displayed and the download will start automatically.
I have tried too but can't download either. After entering the character , it will prompt me with a message : About this page
ReplyDeleteOur systems have detected unusual traffic from your computer network. This page checks to see if it's really you sending the requests, and not a robot. Why did this happen?
IP address: 175.141.42.131
Time: 2014-05-08T00:34:09Z
URL: https://android-x86.googlecode.com/files/android-x86-4.3-20130725.iso
@HARVARD LOW: Thank you for commenting. The link provided above is the official link for the android build. Currently it seems as though they might be having technical issues with their website as I can not download from the link as well.
ReplyDeleteAs soon as the link is back up I will let you know and not only that but I will create an alternative link so that this doesn't happen again.
@Karun Dawadi & @@HARVARD LOW:
ReplyDeleteHere are two alternative links for the Android 4.3 Image file.
1) http://www.4shared.com/get/OxFHyI7T/android-x86-43-20130725.html
2) http://www.4shared.com/file/-13fwx4Tce/android-x86-43-20130725.html
thnx for sharing this precious information but thing is i can not install whats app or instagram so honestly it kind of useless for me but thnx any way....
ReplyDelete@hassan arshad: Download Android_4.1.1_WhatsApp.ova from the link below: http://uploadingit.com/file/view/xsqwzsfvfzaab0p0/Android_4.1.1_WhatsApp.ova
ReplyDeleteOnce downloaded, start VirtualBox, go to File -> Add and choose Android_4.1.1_WhatsApp.ova. Start WhatsApp and enter your mobile phone associated with your Whatsapp account.
BRAD i need 4.3 ova CAN U GIVE ME LINK ??
ReplyDeleteThanks alot, but Viber doesn't work. Please help me!
ReplyDeletewhy when it show android after i install it it is do not work
ReplyDeletewhy i when install it it is show me android and don't work
ReplyDeletesir i an unable to connect my wifi help me sir for connecting
ReplyDelete