Learn how to do anything with technology on NerdsRealm, the world's most popular how-to website. Easy, well-researched, and trustworthy instructions on anything technology.
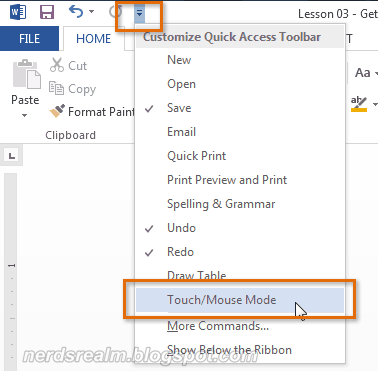
Now you can enable Touch Mode in Microsoft Excel 2013 to make your life much easier if you are working on a touch screen device as the software has the capability to optimize to touch gestures.
Step 1) Click the drop-down arrow to the right of the Quick Access Toolbar, then select Touch/Mouse Mode from the drop-down menu.
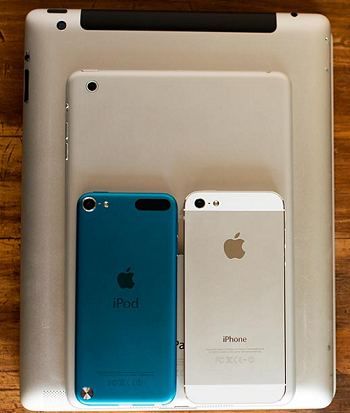
Taking a screenshot with the iPhone is a very easy task. These instructions can be used to take a screenshot on all iOS devices. Any model of iPhone, iPod touch, or iPad (as long as they're running iOS 2.0 or higher). You can't take screenshots on iPod models other than the touch because they don't run on iOS.
Step 1) Find the home button at the centre and the ON/OFF button at the top right of the device.
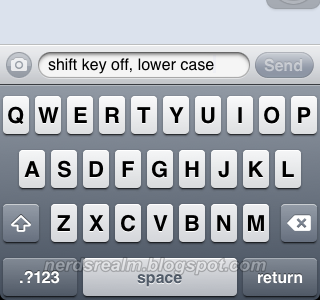
Are you confused by the keyboard changes in from iOS 5 to iOS 7.1? Here's how to tell if the Shift key or the Caps Lock key is on of off.
iOS 5
Shift key off
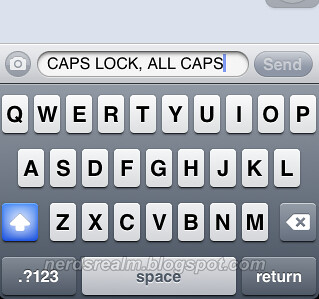
Shift key on
Caps lock on
SUM
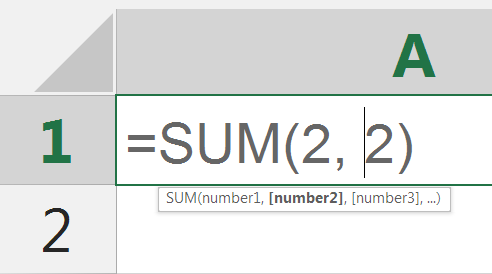
The SUM formula does exactly what you would expect. It allows you to add 2 or more numbers together.
There are three ways you can use this formula in excel (for beginners)
Formula 1:
=SUM(argument1, argument2)
An "argument" can be thought of as any number that you wish to add. (up to a total of 255 items)
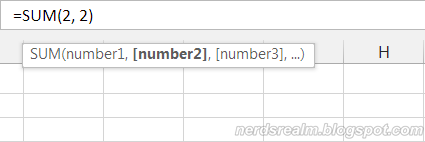
Example: I want to add 2+2 so I can use the formula =SUM(2, 2)
How To Select Text Quickly
1) You can double-click anywhere within a paragraph to select / highlight a word in MS Word.
2) By triple-click anywhere within a paragraph you select the entire paragraph in Word. Or press the CTRL key and click anywhere within the sentence to select the entire sentence.
3) You can also select rectangular blocks of text in a Word document, similar to the marquee tool in Photoshop, and apply formatting to the selected area. Hold down the ALT key and drag your mouse to select any rectangular area
This tutorial explains in a detailed 26 easy step-by-step procedure on how to install Android 4.3 on PC using VirtualBox.
This tutorial is created by me. I have really worked hard on this post as I do in every other post so I have one request. Please show your appreciation by not stealing this post and do not copying it as is without giving me the credit for it. I would really appreciate it. Thank You!
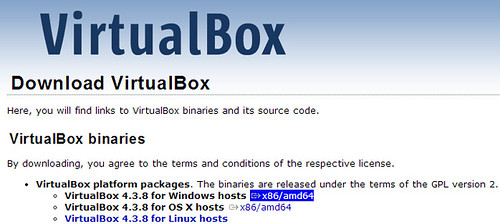
Install VirtualBox latest version from the link given above and open VirtualBox
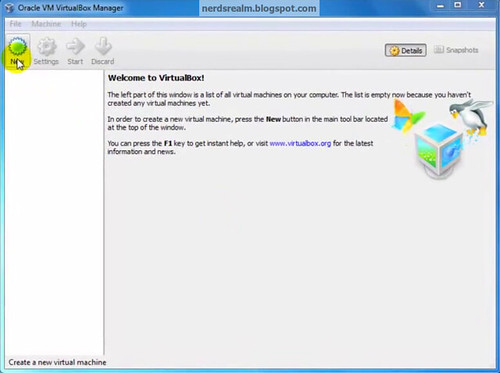
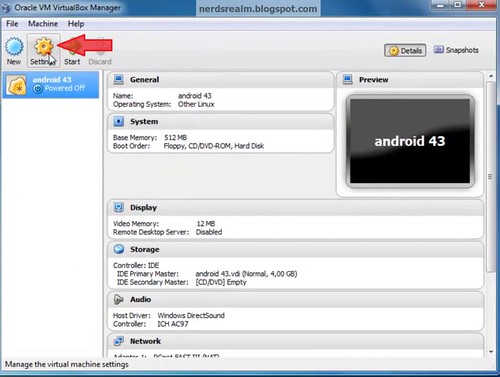
Step 1: Open VirtualBox and select New.
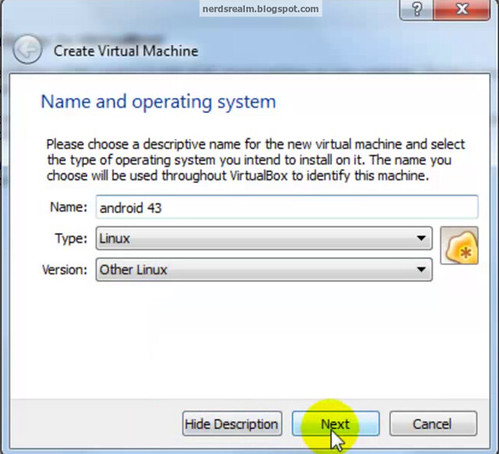
Step 2: In the dialogue box enter the name as you wish and Select type as Linux and version as other and click Next.
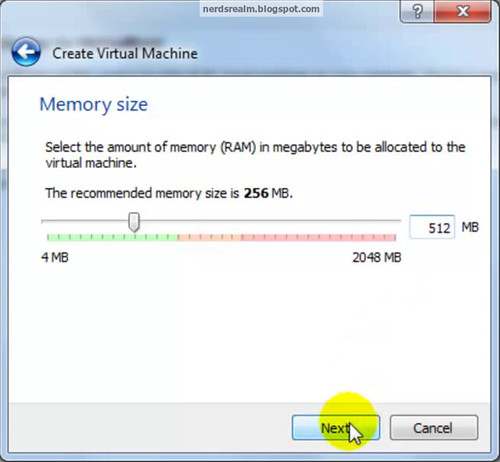
Step 3: Enter the amount of ram you would like to allot for the virtual machine and click Next . Android 4.3 requires at least 1 GB of ram but its not necessary.
Step 4: In the next window select Create a virtual hard disk and click Create.
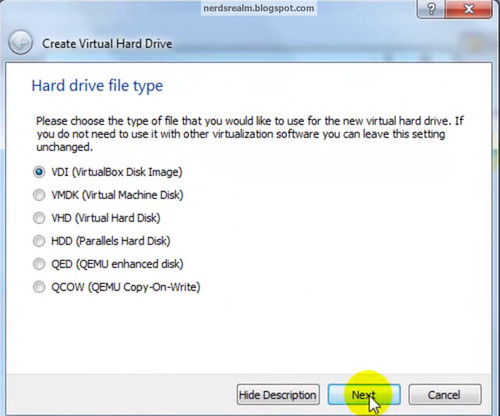
Step 5: Then select VDI and click Next
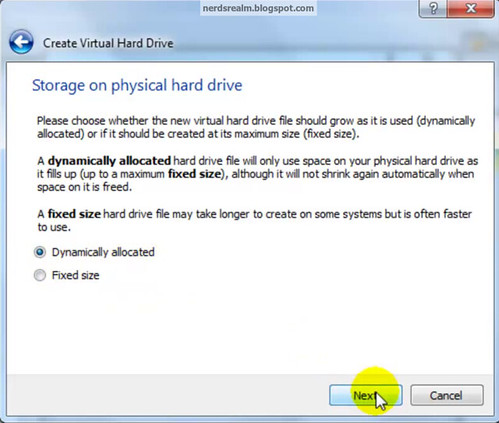
Step 6: In the next window, According to your space requirement you can either select dynamically allocated or fixed size for your storage space . I selected fixed size because I wanted to allocate only 4 GB of storage space to android .
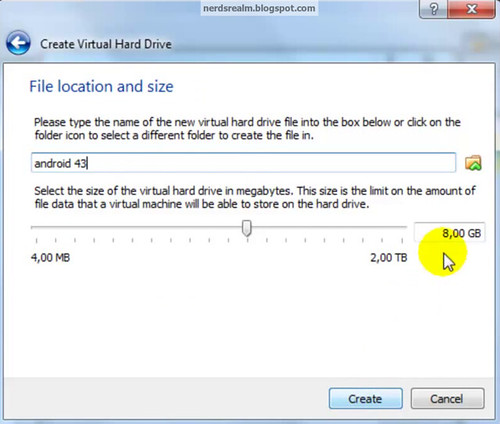
Step 7: Select storage space (Minimum 1 GB required for Jelly Bean)
Step 8: Click on the settings button in VirtualBox .
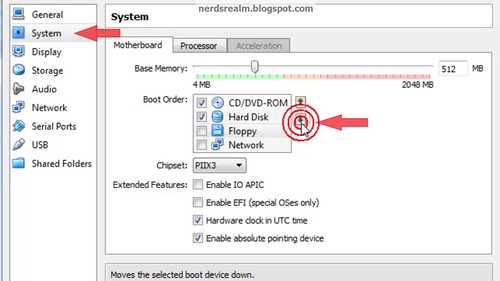
Step 9: Select System and under Motherboard tab select Floppy and untick mark the Floppy option. Using the down arrow key move the Floppy below Hard Disk.
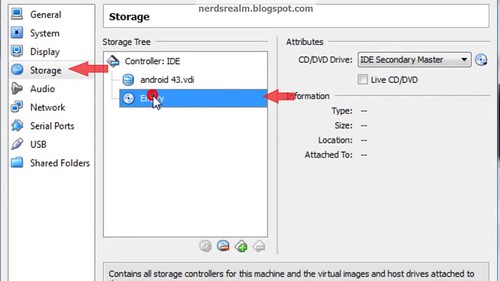
Step 10: Select Storage, below the storage tree select empty.
Step 11: Click on the disk image and select choose a virtual CD/DVD disk file.
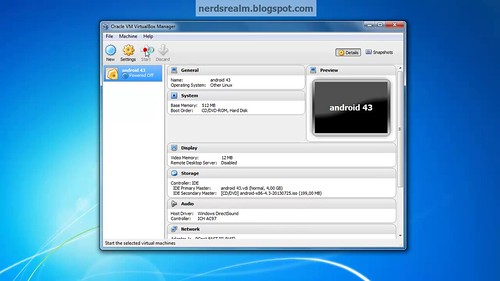
Step 12: Select the android 4.3 .ISO image and click Open. Check the Live CD/DVD box and click Ok .
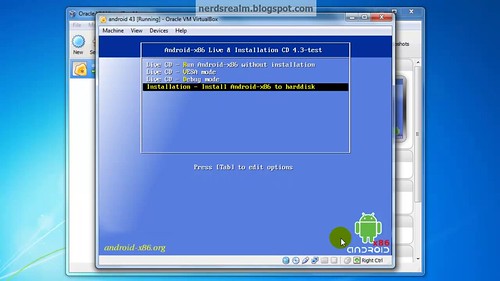
Step 13: Click Start to start the Setup.
Step 14: In the screen select Install Android-x86 to hard disk.
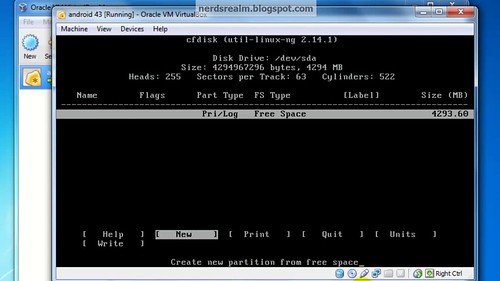
Step 14: Select Create/Modify Partition.
Step 15: Select New using your keyboard arrow keys.
Step 16: Select Primary press Enter.
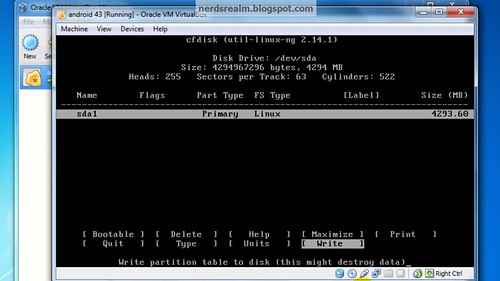
Step 17: Select Bootable and press Enter to make the drive bootable.
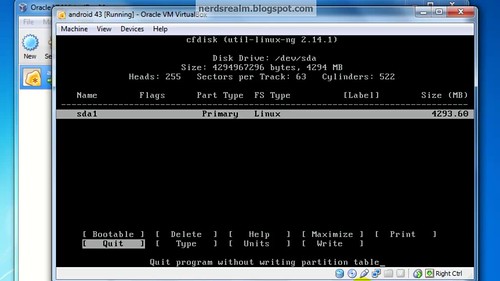
Step 18: Select Write and press Enter
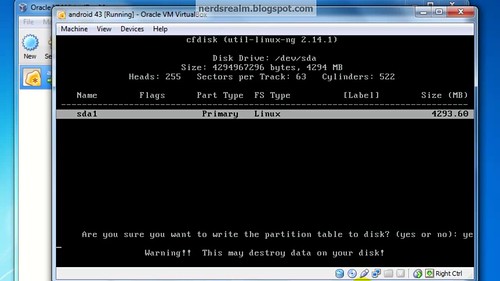
Step 19: Using your keyboard type the word Yes and press Enter.
Step 20: Select Quit and press Enter.
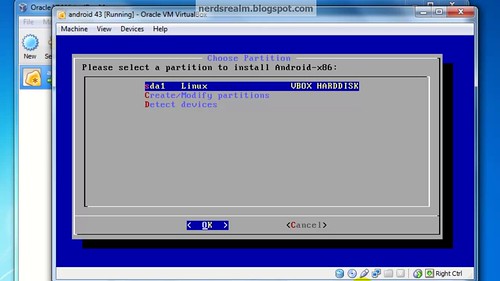
Step 21: Choose sda1 Linux and press OK.
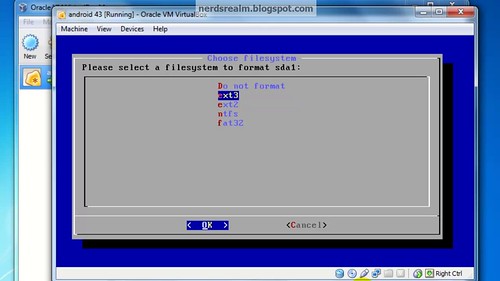
Step 22: Select ext3 and press OK.
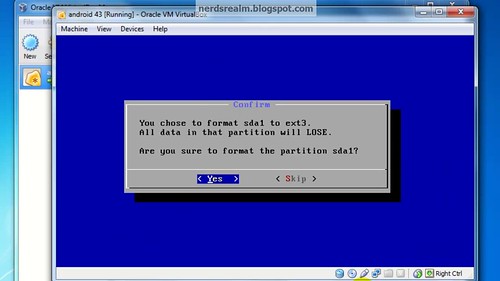
Step 23: Select Yes.
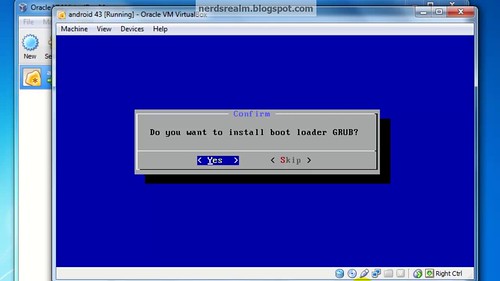
Step 24: When prompted to install grub loader select Yes.
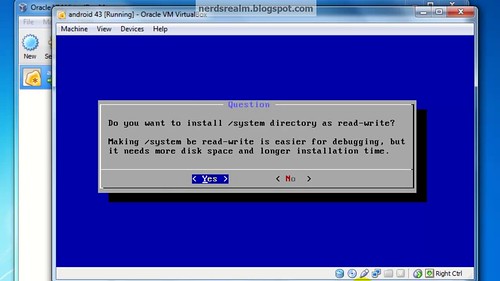
Step 25: Select Yes.
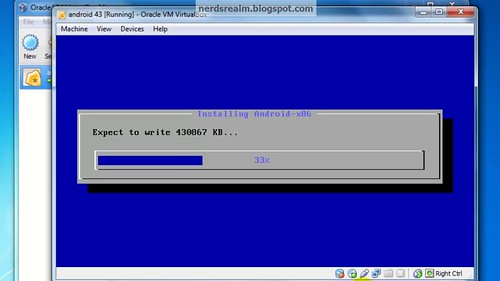
Wait for it...
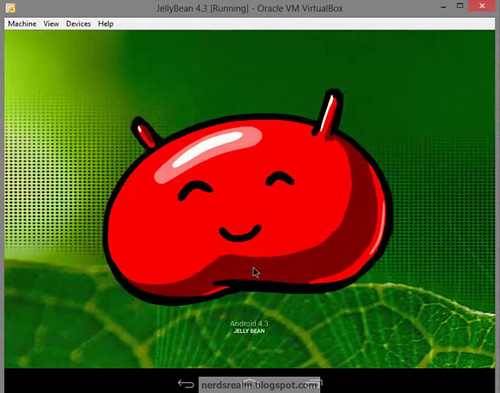
Step 26: Select Machine option on VirtualBox and click on Disable Mouse Integration while Android loads.
Select your language and follow the screen to set-up your Gmail account to your Android among other things.
Voilà! Now you have successfully installed Android 4.3 on your windows computer
Here is a video to help explain the same procedure.
This tutorial explains in a detailed 13 easy step-by-step procedure on how to install Windows 7 using the Windows 7 installation CD.
This tutorial is created by me. I have really worked hard on this post as I do in every other post so I have one request. Please show your appreciation by not stealing this post and do not copying it as is without giving me the credit for it. I would really appreciate it. Thank You!
Before you start this procedure.
Make sure to back up your data: First, make sure there is absolutely NOTHING you cannot afford to lose on the drive you're going to install Windows on (let's say the C: drive.)
Make sure your network cable is unplugged from the wall (to avoid getting viruses from your local area network).
You have a Windows 7 installation CD with a valid Product Key.
Hardware driver discs that shipped with the PC and any components you added on (Optional, but VERY strongly recommended)
Time & Patience (you need to be calm and give the setup a little time)
/>
To remove all hyper-links from Word document that comes with copied text from website. There is a simple way to remove all hyper-links from word file.
Word 2013 comes with its own dictionary, with which it checks your spelling. You have the ability to keep on expanding the dictionary just as a person does to his/her vocabulary.
Example:
I wanted to add the word:
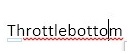
throttlebottom (n.): a dishonest man who holds public office.
I wrote the word on to the page and saw the dreaded wavy red squiggle beneath it, added in typical critical schoolteacher style.
What is a template? Well, A template is a document type that creates a copy of itself when I open it.
For example, I use Fishbone Diagram document that is written in Word or Company Time Record document which is written in Excel quite often. Instead of creating the structure of the document from scratch, I can use the template with predefined page layout, fonts, margins, and styles etc. All I have to do is open the template and fill in the text and the information that is specific to my document. When I save the document as a .docx file, I save document separately from the template on which it is based.
In order to save a file as a template just follow the simple steps provided below:
Example of a Word 2010 Template:
Fishbone Diagram / The Cause and Effect / Ishikawa Diagram
Sohail is a student and a part time blogger. He is the man behind Nerd's Realm (NR). He has a passion for the web and loves offering assistance whenever possible and does through NR.


 />
/>